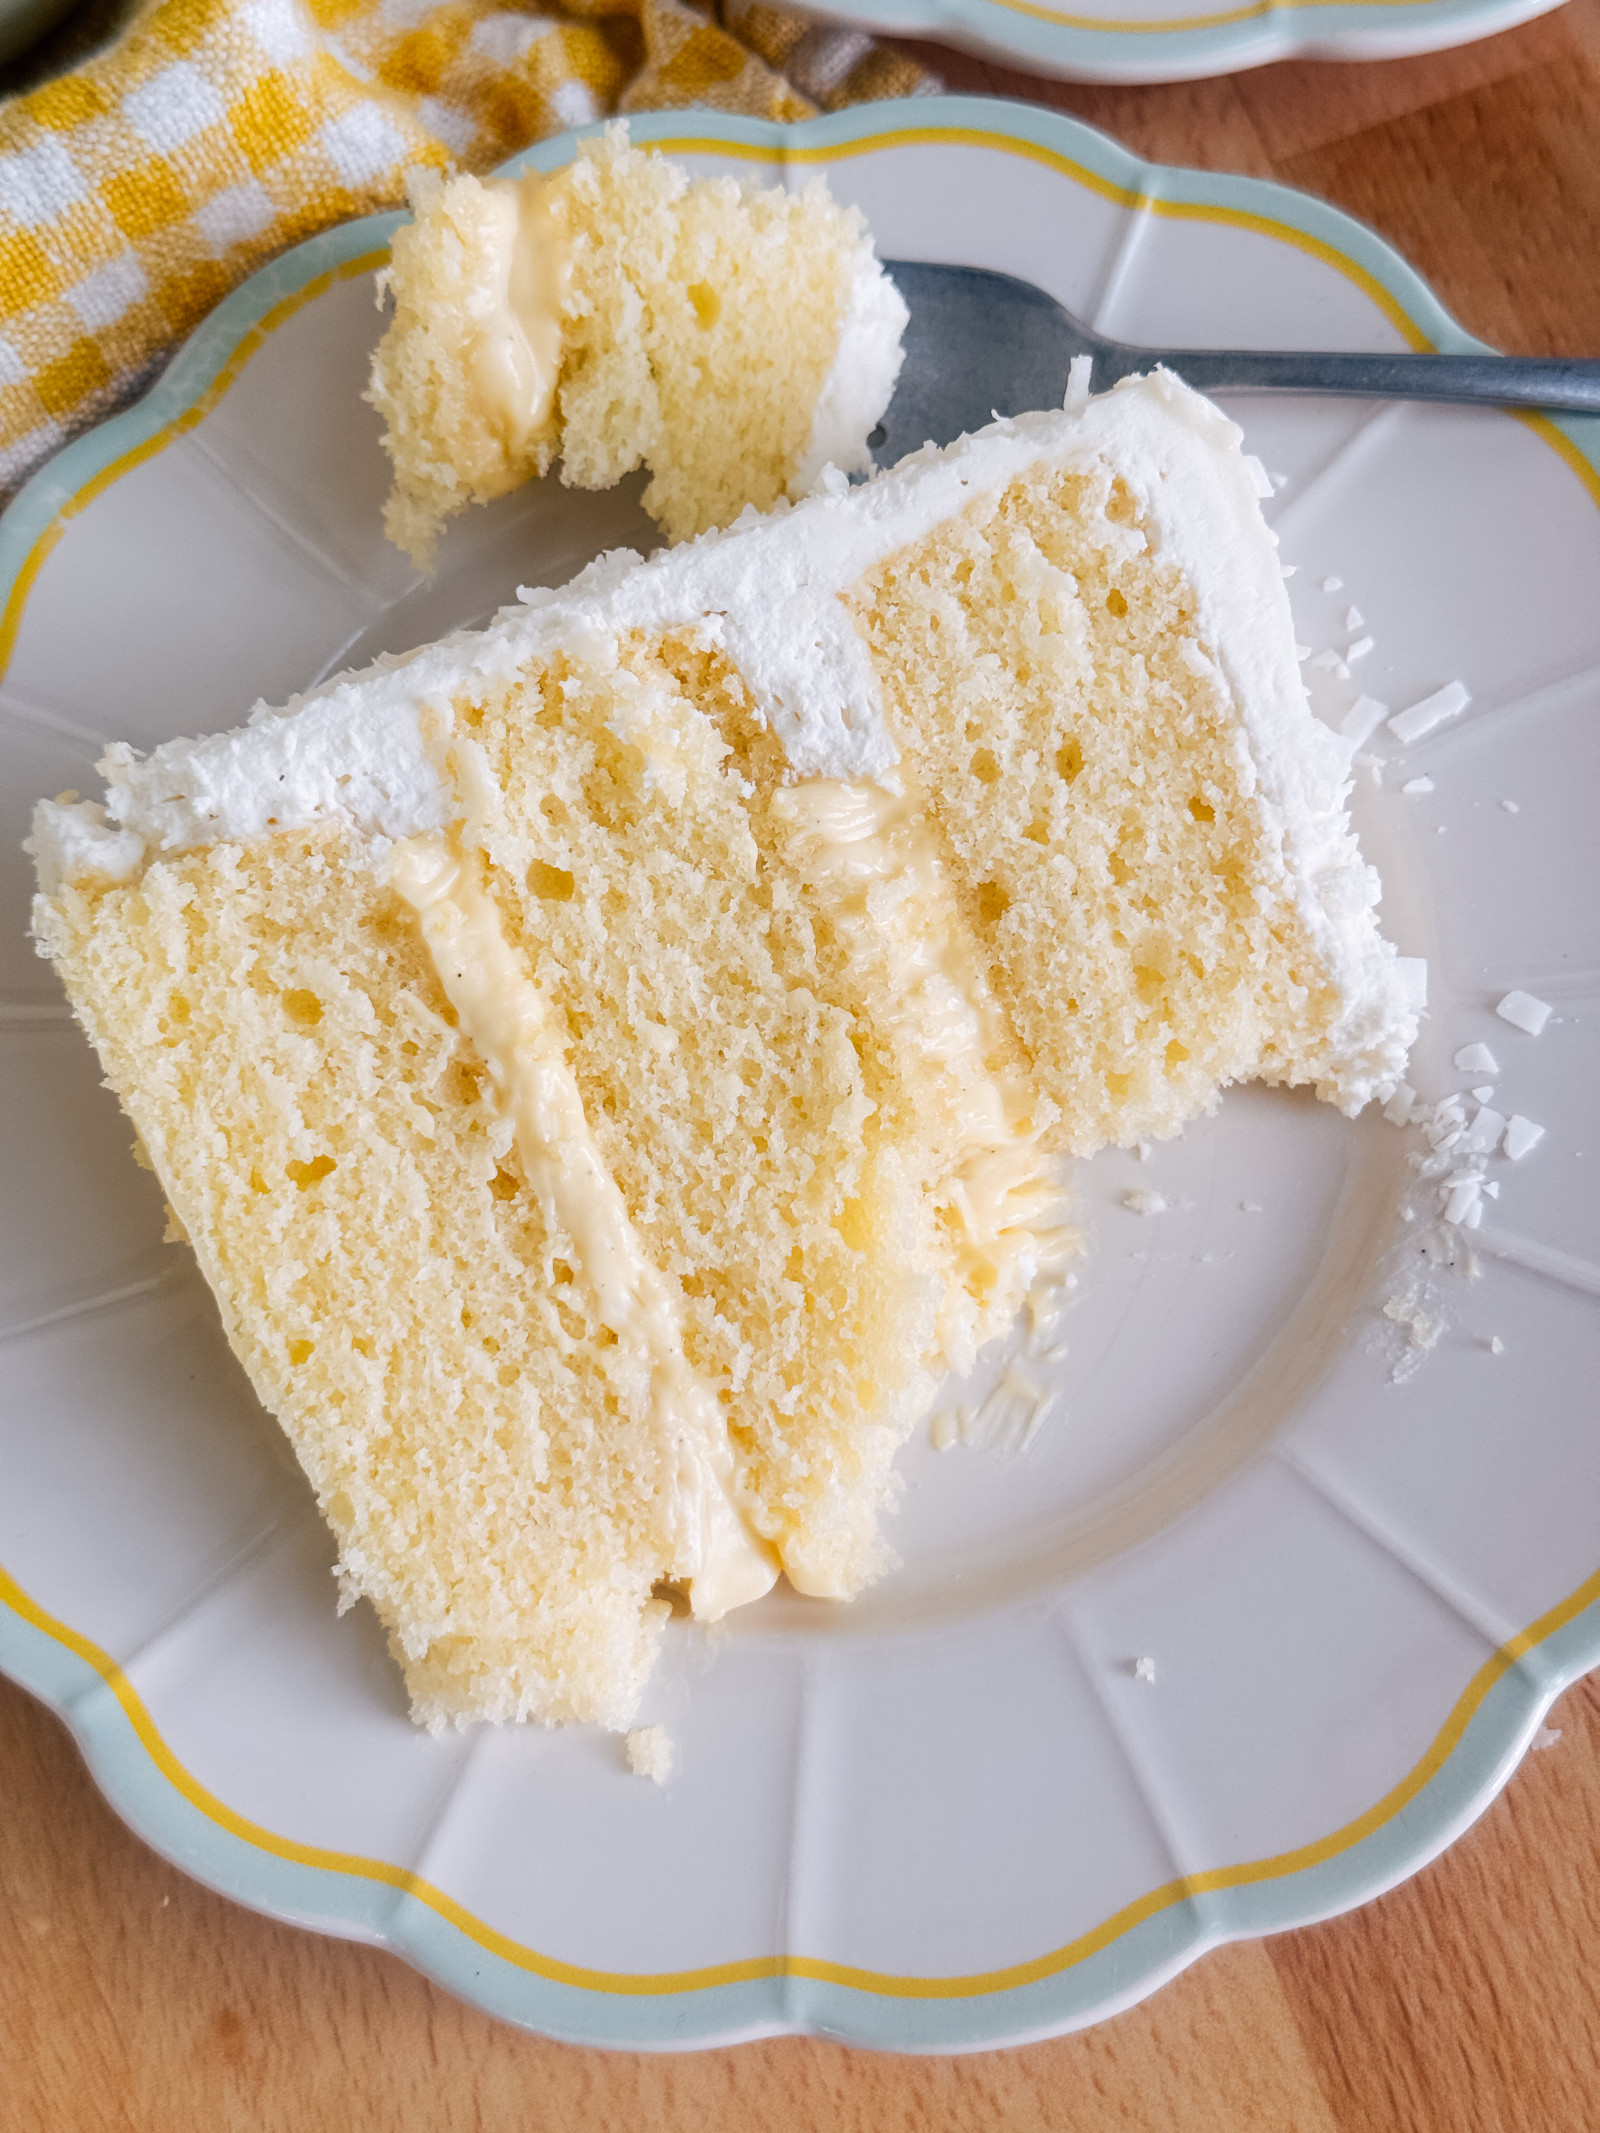
Dive into a taste of Norway with my new sunshine bun-inspired cake with tender yellow cake layers, vanilla custard, vanilla buttercream, and shredded coconut.

What is a Sunshine Bun?
If you’ve ever been to Norway, you’ve likely had one or two (or a dozen) sunshine buns (solboller). A sunshine bun is a Norwegian staple, known for its dollop of vanilla custard, placed in the center of a sweet cinnamon roll-type of bun, resembling a sun. The bun is often flavored with cardamom and is topped with a glaze and coconut flakes.
During our recent trip to Norway, we were taste-testing sunshine buns any chance we got. I loved biting into a pillowy-soft bun with the silky smooth custard filling. The crunchy texture of the shredded coconut was the most delicious bonus in every bite.

Sunshine Bun Inspired Cake
As soon as we arrived home, and the jet lag wore off, I was in the kitchen working on a cake inspired by these delicious baked goods. For my cake version of the sunshine bun (or sun bun, as some call it), I decided to use my Yellow Cake for the base, with a vanilla custard filling from my Creme Brûlée Cake, and vanilla buttercream. Of course, we’re covering the entire cake in shredded coconut, just like you’ll get with the original bun.

How to Make Tender and Moist Yellow Cake
This light and delicious cake starts with my yellow cake layers. To make sure your layers are tender and moist, be sure to follow these tips:
- Start with room temperature ingredients – they will better blend together, which helps ingredients mix evenly, and they are better absorbed by the dry ingredients, which helps your cake to rise better with a more tender texture. For a more in-depth look at the difference, be sure to check out my YouTube video about baking with cold vs. room temperature ingredients.
- Mix the butter, sugar, and oil on medium-high until the mixture is light and fluffy. This will take about 2 to 3 minutes, but helps ensure the sugar dissolves and the mixture starts with a fluffy consistency.
- After you add the eggs, again you want to mix on medium-high speed until the mixture is smooth and fluffy.
- As you add the flour mixture, mix on LOW speed. Over mixing the batter once the flour is added will overwork the gluten and cause a dense cake that doesn’t rise well.

How to Make Vanilla Custard
This custard filling is incredibly delicious and not hard to make if you follow the instructions. I would suggest making the custard a day or two before you want to assemble the cake. That way you have time for the custard to chill and set.
Let’s go over the steps for making homemade custard so you know exactly what to do when it comes time to start:
- Preheat your oven to 300 degrees F. Place an 8″x8″ baking pan in a 9″x13″ baking pan. You’ll be adding water to the larger pan later to create a bath for the custard to cook in – so you’re looking for a pan that is larger than the baking pan that you’ll have the custard in.
- In a medium saucepan, combine 1 cup of the heavy cream with the vanilla bean paste and the sugar. Turn the stove to medium heat and bring the mixture to a boil, stirring often to dissolve the sugar. Once the mixture starts to boil, remove from heat and cover with a lid. Let sit for about 5 to 10 minutes.
- After the cream has steeped, stir in the remaining 1 cup of heavy cream.
- In a small mixing bowl, whisk the egg yolks. Slowly add about 1/4 cup of the heavy cream mixture to the egg yolks, whisking continuously while you do so. This is how you temper the eggs. Once the eggs are tempered, slowly add the egg mixture to the remaining cream, stirring continuously while doing so.
- Strain the custard through a mesh strainer and then pour the strained custard into your 8″x8″ baking pan. Carefully pour hot water into the larger baking pan that the small baking pan is sitting in. You want enough water to go about half way up the side of the baking dish.
- Bake the custard for about 50 to 55 minutes. The center should be barely set. Let cool at room temperature for 1 to 2 hours and then cover with plastic wrap and refrigerate for at least 4 hours before using. I think the custard is best made one or two days before you’re ready to assemble the cake.
- Before using the custard in the cake, you may find that you need to scrape away the top of the custard if a film has formed. You’ll still have plenty of custard to use in the cake. This will just ensure you don’t get any clumps in the custard filling.

How to Make Light and Fluffy Vanilla Buttercream
A light and fluffy buttercream is key to any good cake. A buttercream that’s too thick and dense just takes away from all the other amazing elements and we don’t want that to happen.
To get a light and fluffy homemade buttercream frosting, I have a detailed post: HOW TO MAKE THE BEST BUTTERCREAM to give you in-depth instruction for making your buttercream unreal! Here’s an overview:
- Sift your powdered sugar – this gets any clumps out of the powdered sugar and helps to create a finer consistency, making it easier to get silky, smooth buttercream.
- Don’t use butter that’s too soft – I think it’s good to use butter that’s even a tad cold still. Starting with butter that’s too soft will make it hard to decorate the cake, even after all the ingredients are added. It just won’t be strong enough to support the layers. We can still get super light and fluffy buttercream with butter that’s a little cold. It all comes down to the mixing. Beat the butter on it’s own for a couple minutes to soften it. Then you’ll see later, we’re going to mix again!
- Use heavy whipping cream – Just a few tablespoons go a long way. After adding the heavy whipping cream, you’ll turn the mixer to medium-high. The cream paired with mixing helps to achieve that silky-smooth, light texture.
- Beat for 3 to 5 minutes – this is where magic happens. Beating the buttercream on medium-high for about 3-5 minutes creates a lighter texture. It will also help lighten the color (which we love when we want white buttercream).
- Stir by hand – Before frosting your cake, make sure to stir the buttercream with a wooden spoon or spatula to push out the air pockets. This makes getting smooth sides on your cake so much easier.

FAQs
Yes, just like my other cakes, you can make the elements ahead of time or the entire cake. I like to store cake layers in plastic wrap in the freezer. For buttercream, I store it in an airtight container in the fridge. Same goes for the custard. If you want to make the entire cake ahead of time, freeze it for 30 minutes and then wrap the entire cake in plastic wrap. The coconut flakes will do just fine frozen and later thawed.
You bet! I recommend using Cup4Cup brand or Bob’s Red Mill 1 for 1 Baking Flour. I also like to reduce the gluten free flour by a 1/4 cup when I’m replacing it for cake flour. You will also want to measure and sift the gluten free flour before using.
FOR THE CUSTARD
- 2 cups (462 g) heavy whipping cream
- 1 tablespoon (13 g) vanilla bean paste
- 1/2 cup (100 g) granulated sugar
- 5 egg yolks, from large eggs
- pinch of salt
FOR THE CAKE
- 3 cups (345 g) cake flour
- 2 teaspoons (8 g) baking powder
- 1 teaspoon (6 g) salt
- 1 cup (226 g) unsalted butter, room temperature
- 1 3/4 cups (350 g) granulated sugar
- 1/3 cup (72.6 g) canola oil
- 5 whole eggs, room temperature
- 2 eggs yolks, room temperature
- 1 cup (240 g) sour cream, room temperature (can also use buttermilk in place of sour cream)
- 1 teaspoon (4.2 g) clear vanilla extract
- 1 teaspoon (4.2 g) butter extract
FOR THE BUTTERCREAM
- 2 cups (452g) unsalted butter, slightly chilled
- 6 cups (750g) powdered sugar, measured and then sifted
- 1/4 cup (57.75 g) heavy whipping cream
- 2 teaspoons (8.4 g) vanilla extract
- Pinch of salt
GARNISH
- 1-2 cups shredded sweetened coconut, chopped
FOR THE CUSTARD
-
Preheat your oven to 300 degrees F. Place an 8″x8″ baking dish in a 9″x13″ baking pan. You’ll be adding water to the larger pan later to create a bath for the custard to cook in – so you’re looking for a pan that is larger than the baking pan that you’ll have the custard in.
-
In a medium saucepan, combine 1 cup of the heavy cream with the vanilla bean paste and the sugar. Turn the stove to medium heat and bring the mixture to a boil, stirring often to dissolve the sugar. Once the mixture starts to boil, remove from heat and cover with a lid. Let sit for about 5 to 10 minutes.
-
After the cream has steeped, stir in the remaining 1 cup of heavy cream.
-
In a small mixing bowl, whisk the egg yolks and pinch of salt. Slowly add about 1/4 cup of the heavy cream mixture to the egg yolks, whisking continuously while you do so. This is how you temper the eggs. Once the eggs are tempered, slowly add the egg mixture to the remaining cream, stirring continuously while doing so.
-
Strain the custard through a mesh strainer and then pour the strained custard into your 8″x8″ baking pan. Carefully pour hot water into the larger baking pan that the small baking pan is sitting in. You want enough water to go about half way up the side of the baking dish.
-
Bake the custard for about 45 to 50 minutes. The center should be barely set. Let cool at room temperature for 2 hours and then cover with plastic wrap and refrigerate for at least 4 hours before using. I think the custard is best made one or two days before you’re ready to assemble the cake. After it’s chilled, if you noticed a layer of film on top of the custard, carefully remove it with a spoon (scraping it off) so you don’t have clumps in your custard.
FOR THE CAKE
-
Preheat the oven to 325 degrees F. Spray three 8-inch cake pans with non-stick spray, add parchment and another coat of spray. Set aside.
-
In a medium size bowl, whisk together the cake flour, baking powder, and salt. Set aside.
-
In the bowl of a stand mixer fitted with the paddle attachment, beat the butter, sugar, and canola oil on medium-high until fluffy and smooth, about 2 to 3 minutes.
-
Add the eggs and egg yolks, one at a time to the bowl and beat on medium until well incorporated. Turn the mixer to medium-high and beat for an additional minute or so. The mixture should look smooth and fluffy. Stir in the extracts.
-
Turn the mixer on low and add 1/3 of the flour mixture to the butter mixture and mix until fully incorporated. Then add half of the sour cream and blend well, followed by another 1/3 of the flour mixture, the second half of the sour cream and lastly, add the remaining flour mixture and mix until incorporated.
-
Evenly distribute the cake batter among the three pans (about 16-17 ounces in each) and bake for 25-30 minutes or until a toothpick inserted into the middle of the cakes comes out clean or with just a few crumbs. Make sure not to over bake.
-
Remove cakes from the oven and let cool in pans for 10 to 15 minutes before inverting onto cooling racks to cool completely. Tip: spray the cooling racks with nonstick spray so the cakes don’t stick.
-
Once completely cooled, wrap in plastic wrap and place in the freezer or refrigerator to chill before frosting.
FOR THE BUTTERCREAM
-
In the bowl of a stand mixer fitted with a paddle attachment, beat the butter for about 2 to 3 minutes. This will soften the butter without it having to be warm.
-
With the mixer on low speed, gradually add the sifted powdered sugar, one cup at a time, mixing a little in between each addition.
-
With mixer on medium speed, add whipping cream, vanilla and salt.
-
Turn the mixer to medium-high speed and beat for an additional 3 to 5 minutes. The frosting will become lighter in color and texture.
-
Before spreading on your cake, spend a couple minutes mixing the buttercream by hand with a wooden spoon to push out the air pockets.
ASSEMBLY
-
Place the first cake layer, top side up, on a cake board or cake plate. Pipe a rim of buttercream around the top edge of the cake.
-
Spread half of the custard over the cake layer.
-
Place the second cake layer on top of the custard layer. Pipe a rim of buttercream around the top edge of the cake and fill with custard.
-
Place the final cake layer, top side down, on the custard layer.
-
Apply a thin layer of buttercream around the entire cake. This is the crumb coat. Freeze the cake for 15 minutes to set the crumb coat.
-
Continue frosting the cake with the remaining buttercream and then cover it with the shredded and chopped coconut.
#Norwegian #Inspired #Sunshine #Bun #Cake #Vanilla #Custard #Filling